14sept19

14sept19

Tuesday, January 27, 2015

That professional look: how to tie a culinary neckerchief

Some students and teachers have requested a brief practicum on tying a chef's kerchief.


Your culinary cravat adds a professional look to your coat and trousers. And, like a business or dress tie, it's a classic Windsor knot.

If you don't wear a tie every day, you'll want to practice this to be sure it's crisp and tight for a professional, pulled-together look. 

Herewith, a lucid YouTube presentation from The Chef's Academy that should help you get a perfect know every time:  www.youtube.com/watch?v=D_zqIYgTRUM

This is a very basic single-knot tie, but there is a trick, so we are also giving you a step-by-step written guide.(e-How helped with these instructions.)

Instructions
1) Fold the neckerchief in half diagonally to form a large triangle. Press the triangle with a warm iron to get a crisp fold. Turn the neckerchief so that the point is closest to you.


2)
Fold the point up toward the long edge about 3 inches and flatten the fold.


3) Take the folded edge in your hand and fold it over again about 3 inches. Continue folding in this manner until you are about 2 to 3 inches from the long edge of the neckerchief.


4)
Fold the long edge down to meet the top fold, and continue folding up as before. This ensures a neat finished edge on your cravat.


5) Iron the folded neckerchief to obtain a clean, professional look.


6)
Place the neckerchief around your neck, arranging the midpoint at the center of the back of your neck. Pull the ends over your shoulders and adjust the ends as necessary so they are even.


7) Cross the left end of the neckerchief over the right end, and bring the left end up and through the part that is around your neck.


8)
Cross the right end of the neckerchief over the left end, and pull the right end through to make a knot.


9)
Pull both ends to tighten the knot, making sure the ends are the same length.
10)
Arrange the neckerchief by gently tugging the knot so that it is centered at the front of your neck.


11)
Tuck the ends inside the front of your chef's coat to finish the look.


PRACTICE - Notes, January 24, 2015


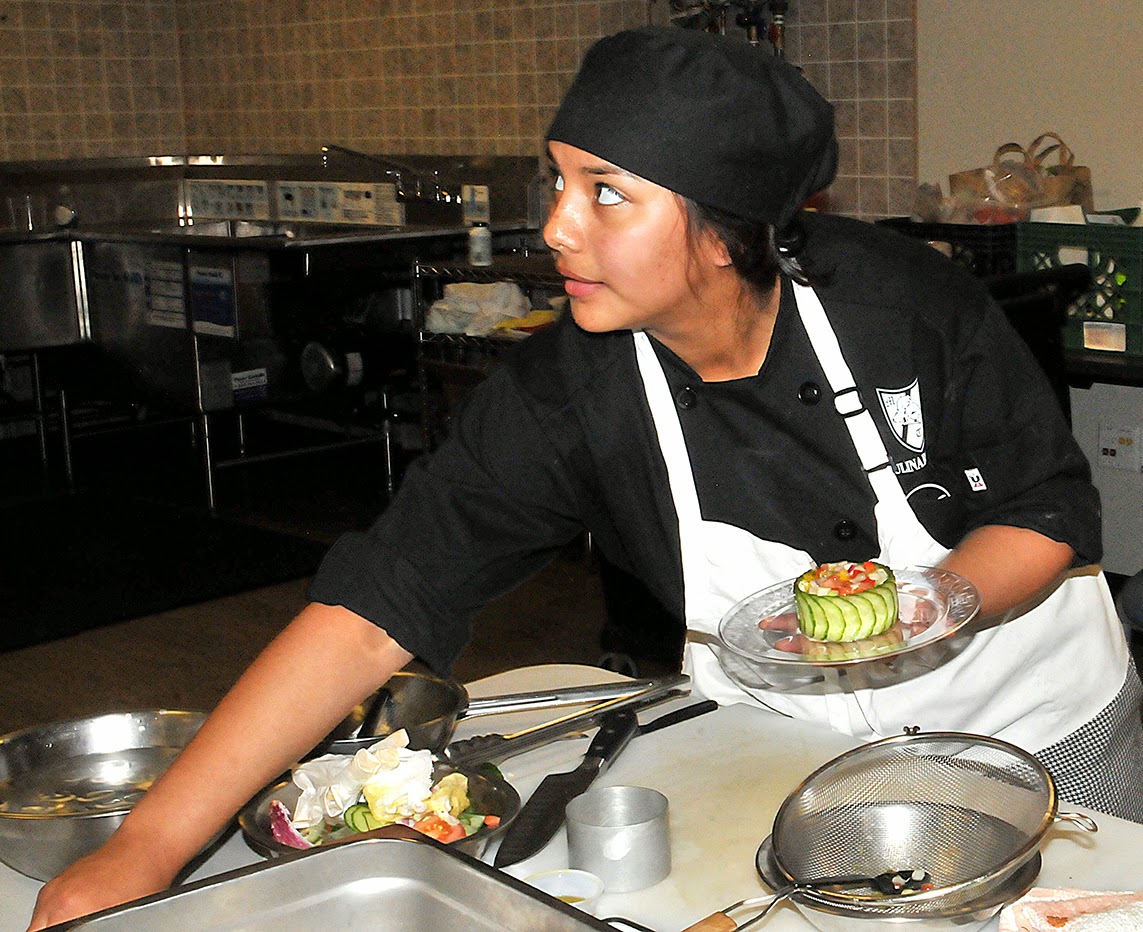
2012 C-CAP grad Jack Quijada was back in town and stopped in at the Saturday C-CAP preliminary practice at Southwest Gas' headquarters in Phoenix to catch up and assess this year's competitors.

A MetroTech and Classic Cooking Academy veteran, Jack also took top honors in the Skills USA competition before taking off for Manhattan and a stint at DB Modern.

"I did stages and worked my way up the line to saucier," he says.  "And I know I coulda stayed longer, but…"

He's a young professional, going places - and so he helped open Atrium in Brooklyn, where he became sous chef before moving on to his current position as sous chef on a Mississippi River cruise ship.

"Kitchen life is rough," he told the students. "Every day I work is jam-packed.  You need to love it enough to go back for the punishment every day.

"It takes everything. I mean - you learn why they call the staff dinner 'family meal.'  These people are your family."

On the other hand, he encouraged them, "It all depends on how far you want to go.  You need to let people see how much you want it."

He and chef Howard Pierceall of Sysco, along with C-CAP Arizona instructor chef Nicole deKruyter had crisp, clear assessments of the students' efforts.

Generally, chef Howard lauded the students' overall organizational skills, as did chefs Jack and Nicole.

On salads, chef Nicole says, "Everyone seems to have the recipe down, and I've seen some really good vinaigrette.  Time management is a critical issue."

"They still need to learn to trust their taste," chef Howard says.  "But the seasoning is getting there."

Here are some very specific suggestions from these chefs:
- Make sure you're filling the salad mold - don't cheat the guest!
- Get a feel for how much product you need to fill the salad molds.  You waste time and product when you overcut.
- Make sure you're cutting the right size dice.  It's easier when your knife is sharp enough!

Chef Howard gave notes on omelets, too:
- Classic French omelets are rolled, not folded! Practice rolling the omelet out of your pan by placing one hand firmly under the handle, lifting and tilting over the plate. Do not let it crease or break!
- If your omelet has turned a golden brown, it's overcooked. Keep it an even, consistent pale lemon color.
- Put a little bit of butter or oil in your eggs to help the omelet release from the pan.
- Be careful about how hot your pan is.  You need to be sensitive to both time and temperature.

- Don't forget to season your omelet judiciously.  It's salt and pepper - and yes, white pepper looks prettier (and it's also a tiny bit more sharp, so you need to know how this tastes before you cook!)


Here's the 2015 C-CAP salad recipe

WHY?  

We're reprinting this recipe because it's changed from last year.  Take time to review this - and practice it.  You're going to spend some time emulsifying this vinaigrette, and trust us on this: the judges will want to see a real emulsion, with no visible drops of oil floating or landing on your vegetables.


Tomato, Cucumber & Bell Pepper Salad
Yield: 2 portions
 INGREDIENTS
1 whole tomato; peeled, seeded, small dice
1/2 English cucumber (preferred); peeled, seeded and small dice
1/2 English cucumber (preferred); thinly sliced
1/4 red bell pepper, small dice
1/4 yellow bell pepper; small dice
1/4 red onion; small dice
1/4 jicama, small dice (if available)


Vinaigrette:
2 Tbs. fresh lime juice
1 Tbs. vinegar (rice, white wine or tarragon)

6 Tbs. olive oil (light or virgin)
2 Tsp. minced cilantro**
1/8 Tsp. salt
1/8 Tsp. black pepper

Tasting Note: Add additional vinegar, salt and/or black pepper to balance out the dressing if necessary.

PROCEDURE
1.    In a bowl, add lime juice, vinegar, salt, and black pepper. Incorporate the olive oil slowly, whisking vigorously until emulsified. Add minced cilantro and blend well. Remember to taste and readjust seasoning if necessary.
2.    In a separate bowl, combine all the diced vegetables* and toss with a small amount of the vinaigrette, use enough to coat the vegetables. Do not overdress the salad.
3.    Taste and readjust seasoning with salt and/or pepper, if necessary.
4.    Arrange the thinly sliced cucumbers in a lightly oiled ring mold (2” deep, 3” round), on a large plate. (You will need approximately 12-14 slices of cucumber.)
5.    Drain the diced vegetables of any extra vinaigrette, preferably with a small sieve.
6.    Fill the ring mold lined with cucumbers with the drained vegetables just to the rim of the cucumber slices and press lightly with the back of a spoon to compress the vegetables.
7.    Unmold the salad, making sure you have filled the mold.
________________________________________________________________

* Size of whole ingredients, prior to cutting, will vary. Competitors must judge the proper proportions of ingredients to use in order to create a delicious tasting salad. We recommend approximately two tablespoons of each cut vegetable per salad but correct proportions will require practice and tasting your salads. Your first dice cut determines the size of all your cuts!
** Arizona judges require your cilantro be very finely minced ("dust" and mixed with your vegetables. THERE IS NO GARNISH - and you can expect to lose points for adding it.

Monday, January 26, 2015